Hello and a warm welcome to The Official Magnolia Inspiration Challenge (TOMIC) blog which is made especially for you Magnolia lovers by the International Magnolia Design Team!
Hello Magnolia lovers!
The Magnolia DT is proud to present last challenge's TOP 5. It was a tough job and we would like to thank you all for joining us with so many gorgeous entries!
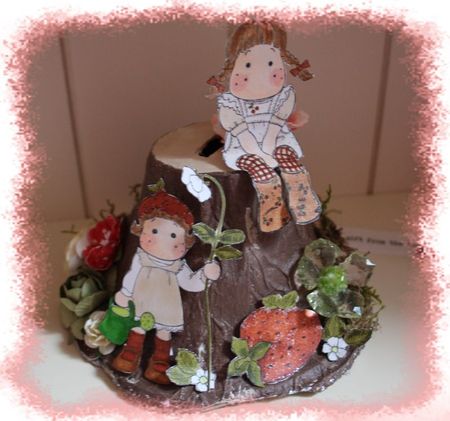
Congrats to all of you for those beautiful recycled projects and please send us a mail at TOMICblog@gmail.com so we can send you your badges.
And the lucky winner of the Guest DT spot is:13 - Paola!! Congratulations Paola!! Please send us a mail to TOMICblog@gmail.com so we can send you your badges and all the informations you need for this great adventure. If you can't join us, please let us know.
We also wanted to remind you of our current challenge which is "back to school + metal" that you can find here.We sure hope that many of you will come and join the fun!
First we would like to give you the boring part of the message today by reminding you of some necessary rules in order to be fair to all the great participations we receive:
- Happy news cause you now have more time to play with us as the due date to submit has been extended to Sunday 20:00 (Paris time).
- As the challenges are sponsored by the great MAGNOLIA for all the generous secret prizes, your main stamp image has to be Magnolia.
- We are pleased to see your creations in our challenge, just be cautious not to combine our challenge with more than 5 other challenges.
- Each week you have a fun and gorgeous new challenge with a theme to follow to be able to enter our challenge. what you need to do is explained in the post and sure want to follow this to be part of the draw!
- Unfortunately, the entries that won't follow the rules will be cancelled and won't be entering the draw for the Magnolia secret prize, neither won't they be picked as Top 5 or Guest DT spot.
For this week's challenge which is about recycling, you do have to show us the before/after pictures of your recycled details on your blog. If we don't see this, sorry but you won't be eligible and that would be a shame considering the hard work you put into your project.
But now to the happy part of this post ...
The Magnolia DT is proud to present last challenge's TOP 5. It was a tough job and we would like to thank you all for joining us.
We also wanted to remind you of our current challenge which is "Recycling" and that you can find here.
Huge congratulations Angie!
Please can you email us at TOMICblog@gmail.com, placing 'Guest DT Spot' as the Subject and we can send your your Guest DT badge and the theme of the future challenge. If you are unable to join us please let us know and we will then pick another guest.
We hope you will be able to join us for this week's challenge!
The Magnolia DT is proud to present last challenge's TOP 5. It was very difficult to choose and we would like to thank you all for joining us, we enjoyed visiting your blogs to see all your gorgeous masked creations.
Please can you email us at TOMICblog@gmail.com, placing 'Guest DT Spot' as the Subject and we can send you your Guest DT badge and the theme of the future challenge. If you are unable to join us please let us know and we will then pick another guest.
We also wanted to remind you of our current challenge which is "Monochromatic" and that you can find here.
Congrats to you, please send your name and address to : TOMICblog@gmail.com so Magnolia can send you a secret prize!
Welcome to TOMIC new challenge :
Monochromatic
Please read the rules on the sidebar before submitting.
We are so happy to have Karita for Guest Designer this week, here is her stunning creation.
So here come the marvellous creations made by our talented dt members for your inspiration. You can find all our blogs on the sidebar and see more gorgeous Magnolia creations. Click on the name to go directly to the member's blog.
The Magnolia DT is proud to present last challenge's TOP 5. It was extremely difficult to choose and we would like to thank you all for joining us, we enjoyed visiting your blogs to see all your gorgeous
round creations.
Please can you email us at TOMICblog@gmail.com, placing 'Guest DT Spot' as the Subject and we can send you your Guest DT badge and the theme of the future challenge. If you are unable to join us please let us know and we will then pick another guest.
We also wanted to remind you of our current challenge which is "masking several stamps" and that you can find here
Hello Magnolia lovers!
First we would like to thank you very much for all the entries into our Round Card challenge, we loved visiting you and seeing all the wonderful round creations.
Before giving you the new challenge, we would like to announce the random result. And the winner for Challenge # 9 is
Big congratulations! Please send your name and address to : TOMICblog@gmail.com with subject "winner TOMIC #9" so Magnolia can send you a secret prize!
Now we want to welcome you to this week's new challenge which is Masking
Before the challenge starts I will show you how to mask stamps together:
1. Here are a few things you need
2. The stamps is the most important:) I use to place them first, as I want the scene to be. As you can see I have Tilda in front, and the scenery behind her.
The two stamps I want to mask together is:
Sweetie Tilda
Bird Background
Both from the Sweet Rainbow Collection 2011
3. Since Tilda is in front of my scene, I have to stamp her first, and then mask her.
I use a post-it-note and water colour paper. (Use the paper you normally colour your images on).
And I will later explain why it is clever to use post-it-notes.
4. Then I stamp Sweetie Tilda on both papers, as you can see under.
5. Then I have to cut the one on the post-it-note out ("Yellow-Tilda").
6. Cut, cut, cut.... I am done:)
7. Then I place the "Yellow-Tilda" on the "White-Tilda". And since I have used a post-it-note I have glue behind some parts of the yellow paper.
Then you can be sure that the paper sits perfectly all the time.
8. Now it is time to stamp "The Bird Background" upon Tilda. I like to use the acrylic block with stripes, then it is easier to place the image like I want it.
9. Okay, ink the image:)
10. Place the background stamp on the masked Tilda.
11. Now it looks like this. It is alway exciting to see if the scene looks fine.
12. It looks perfect! Now I can start the colouring.
I can't wait to see your masked images this week!!
And remember, you can mask more than two stamps also.
Please read the rules on the sidebar before submitting.
♥♥♥
We are so happy to have Queen Bjoining us as this week's Guest Designer! Here is Queen B's stunning creation.
And just take a look at what our wonderful Magnolia DT members have made for this challenge. You can find all our blogs on the sidebar and see more gorgeous Magnolia creations!